
This post may contain affiliate links. Please read my privacy policy.
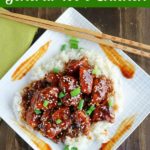
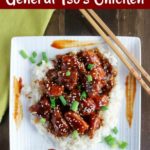
Baked General Tso’s Chicken is a mouthwatering, lighter version of the restaurant classic. So skip the takeout, and make it at home instead! Easy to make, and on the table in about 30 minutes
This post and recipe card updated March 7, 2020

I’m a huge fan of Asian cuisine, and could probably eat it every day. For years, I always ordered General Tso’s chicken at restaurants. No, deep-fried chicken chunks aren’t really healthy, but they sure taste good.
Over time I’ve learned to make some of my favorite Asian style recipes, including Kung Pao Chicken, Crispy Baked Egg Rolls, and Shrimp Fried Rice. So I was so happy when I finally mastered Baked General Tso’s Chicken
WHY THIS RECIPE WORKS
- You make the sauce, so you can control the ingredients
- The chicken is baked, so it’s a fraction of the fat and calories of the traditional
- It’s an easy recipe that’s on the table in about 30 minutes
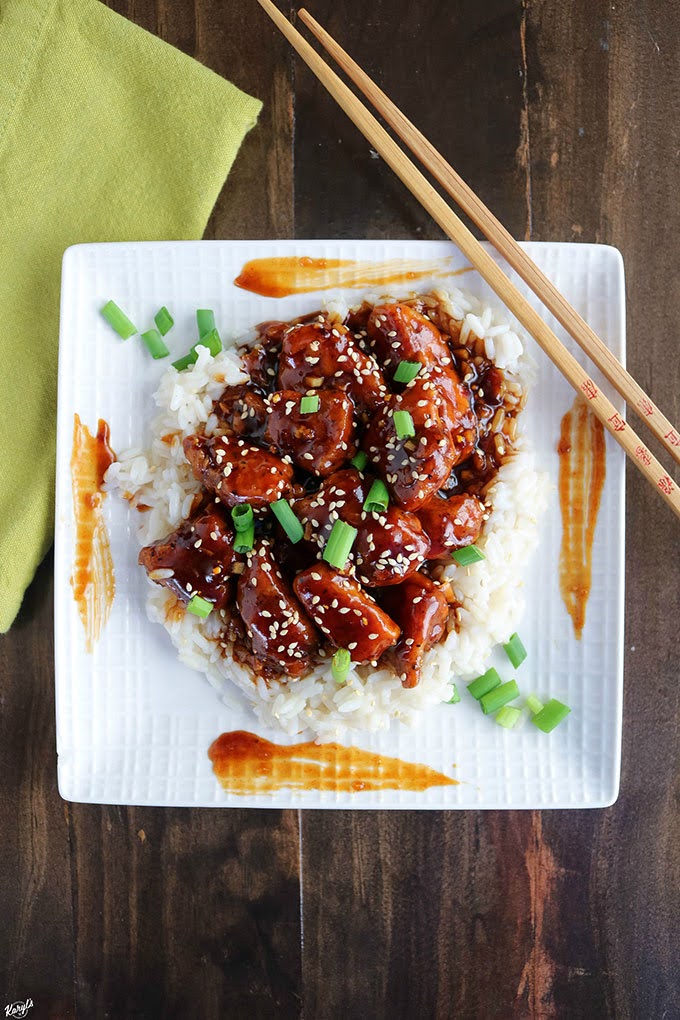
Oh man, every time I take a bite of Baked General Tso’s Chicken it takes me back to my restaurant orders. The sauce is rich and flavorful, and the chicken is tender.
Like many recipes, I had my fair share of failures with Baked General Tso’s Chicken.

Yes, this was my first, sad attempt. But it smelled and tasted perfect, so I knew I was on the right track.
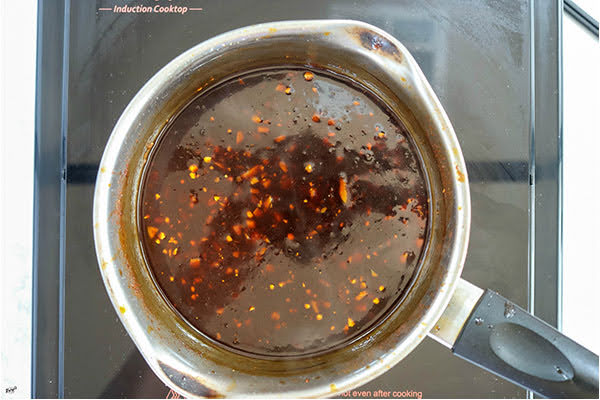
IMPORTANT TIPS FOR THE SAUCE
The sauce is really the key to Baked General Tso’s Chicken, and it’s the technique that will make or break the results.
NOTE: I have significantly reduced the amount of sugar and hot chili paste from the original recipe. I think I had a death wish with the chili paste because it was a ridiculous amount. And you get just as much flavor from much less sugar.
Let the sugar and water cook down properly. I rushed that step in my first few attempts, so the mixture never turned golden brown, and so it didn’t have the same depth of flavor.
Simmer the sauce for about 5 minutes after adding the cornstarch. If you don’t give it enough time, the sauce won’t thicken properly.
Don’t add cold ingredients to the hot sugar/water, or it will seize and clump. I keep my Low Sodium Soy Sauce and Hot Chili Paste in the fridge, so I mix the sauce ingredients together first so it has time to all come to room temperature. Plus, I whisk constantly as I add the ingredients to the saucepan.
Hot Chili Paste is powerful. You can find a variety of chili pastes, both hot and sweet, in the Asian aisle of the grocery store. Be careful with the hot, because once you add it, you can’t take it out.
I have a love/hate relationship with sesame oil, and a little goes a LONG way. I use Toasted Sesame Oil, but you could also use regular oil if you prefer.

RAW OR ROASTED GARLIC FOR THE SAUCE?
Originally I used roasted garlic for the sauce because roasted garlic is fabulous. Roasting develops an intense sweet flavor that you can almost eat straight.
I like to roast a couple of heads at a time, and you can keep it in an airtight container in the fridge for up to 3 weeks. I use it in my Peppercorn Garlic Pork Chops, Maple Mustard Garlic Sheet Pan Chicken, Chicken Chickpea Salad, and Roasted Vegetable Farro Salad.
If you don’t have roasted garlic or don’t want to use it, you can most certainly substitute raw garlic. I prefer the roasted garlic flavor in Baked General Tso’s Chicken, but still love it with raw.

STEP BY STEP INSTRUCTIONS
Preheat the oven to 375 degrees.
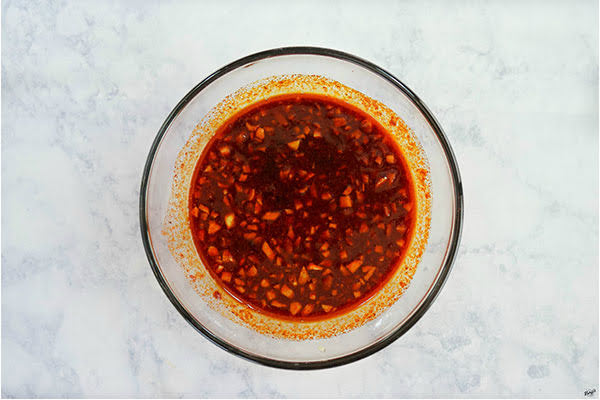
In a medium bowl, combine soy sauce, rice vinegar, sesame oil, paprika, hot chili paste, garlic, and fresh ginger. Set aside.
Combine flour, black pepper, cayenne pepper, garlic powder, onion powder, ground ginger, and salt in a container with a lid.
Season chicken with salt and pepper. Transfer the chicken to the egg wash and coat well. Transfer chicken to flour mixture and toss well to fully coat.
Transfer the chicken to a foil-lined baking sheet and bake for 15 minutes.
While the chicken bakes, add sugar and water to a medium saucepan, and cook over medium-low heat until just golden.

Pour the sauce mixture into the saucepan, whisking constantly
Simmer for 3 minutes, whisking occasionally.
Add cornstarch and water in a small bowl and stir to combine. Pour into the sauce and whisk well to fully combine. Simmer for 5 minutes.
Transfer chicken to the saucepan, and toss to combine. Remove the pan from the heat and let sit for 2-3 minutes.
Serve Baked General Tso’s Chicken over rice, and garnish with Toasted Sesame Seeds and green onions.

FREQUENTLY ASKED QUESTIONS
Can I use another cut of chicken? Absolutely. I use boneless/skinless chicken thighs, but the sauce is perfect on wings, tenders, or whole pieces of chicken.
Can I make the sauce ahead? I don’t recommend making it ahead, because it will get kind of clumpy when reheated. The sauce cooks while the chicken bakes, so it really is very convenient to do it all at once.
Can I roast the garlic along with the chicken? Yes! I recommend roasting individual cloves with the skin removed, so it roasts quickly. It won’t get quite as roasted as when you do the whole heads, but it still adds great flavor
MORE DELICIOUS CHICKEN RECIPES
- Dirty Rice Chicken Skillet
- Thai Chicken Meatball Lettuce Cups
- Tomato Basil Braised Chicken
- Spicy Chicken Vegetable Stir Fry
- Grilled Thai Chicken Thighs
DID YOU MAKE THIS RECIPE? COMMENT AND RATE BELOW, THEN TAKE A PICTURE AND TAG ME ON FACEBOOK AND INSTAGRAM: @KARYLSKULINARYKRUSADE
FOLLOW ME ON INSTAGRAM AND PINTEREST FOR MORE RECIPES!

Baked General Tso's Chicken
Baked General Tso’s Chicken is a mouthwatering, lighter version of the restaurant classic. So skip the takeout, and make it at home instead! Easy to make, and on the table in about 30 minutes
Ingredients
CHICKEN
- 2 boneless/skinless chicken thighs (8oz), cut into bite-size pieces
- 1 egg, lightly beaten
- 1/4 cup flour
- 1/2 teaspoon black pepper
- 1 teaspoon salt
- 1/4 teaspoon cayenne pepper
- 1/4 teaspoon garlic powder
- 1/4 teaspoon onion powder
- 1 Tablespoon ground ginger
SAUCE
- 1/4 cup sugar
- 1/4 cup water
- 4 Tablespoons low sodium soy sauce
- 4 Tablespoons rice wine vinegar
- 1 teaspoon Toasted Sesame Oil (optional)
- 2 teaspoons paprika
- 1/2 Tablespoon hot chili paste
- 4 cloves finely minced garlic (raw or roasted)
- 1 Tablespoon freshly grated ginger
- 1/4 cup water
- 2 teaspoons corn starch
GARNISH
- 2 spring onions, cut into small pieces
- 2 teaspoons Toasted Sesame Seeds
Instructions
- Preheat oven to 375 degrees
- In a small bowl, mix together the soy sauce, rice wine vinegar, toasted sesame oil, water, paprika, chili paste, salt, garlic, and ginger. Whisk to combine and set aside
- Prepare a breading station. In one container with a lid combine the flour, salt, black pepper, cayenne, garlic powder, onion powder, ground ginger
- In another container with a lid, whisk the egg and add 1 Tablespoon of water
- Add the diced chicken into the egg wash, seal the container and shake to coat
- Transfer the chicken to the flour mixture, seal the container and shake to fully coat
- Transfer the chicken to a baking rack on a baking sheet. Lightly drizzle the tops with a little bit of oil
- Bake the chicken for 15 minutes
- Prepare the sauce while the chicken bakes
- In a medium saucepan, add the sugar and water. Bring to a low boil and cook until it becomes a light amber color. Watch carefully, so it doesn't scald.
- Carefully add the sauce mixture to saucepan, whisking well to make sure it doesn't clump. Simmer for 4-5 minutes, whisking occasionally
- Combine the water and cornstarch, and mix to dissolve cornstarch. Add to the sauce mixture, and mix for 2-3 minutes until slightly thickened
- Add the chicken to the sauce, and toss to combine. Remove the pan from the heat and let it rest for about 2 minutes.
- Serve chicken over steamed rice. Top with sesame seeds and spring onions
Notes
NOTE: I have significantly reduced the amount of sugar and hot chili paste from the original recipe. I think I had a death wish with the chili paste because it was a ridiculous amount. And you get just as much flavor from much less sugar.
IMPORTANT TIPS FOR THE SAUCE
- Let the sugar and water cook down properly, so the mixture turns golden brown
- Simmer the sauce for about 5 minutes after adding the cornstarch, so the sauce thickens properly
- Don’t add cold ingredients to the hot sugar/water, or it will seize and clump. Mix the sauce ingredients before even breading the chicken, so it comes to room temperature
- If you don't have roasted garlic, you can substitute raw
If the sugar/water mixture still clumps when you add the sauce, stir constantly for about a minute with a wooden spoon.
FREQUENTLY ASKED QUESTIONS
Can I use another cut of chicken? Absolutely. I use boneless/skinless chicken thighs, but the sauce is perfect on wings, tenders, or whole pieces of chicken.
Can I make the sauce ahead? I don’t recommend making it ahead, because it will get kind of clumpy when reheated. The sauce cooks while the chicken bakes, so it really is very convenient to do it all at once.
Can I roast the garlic along with the chicken? Yes! I recommend roasting individual cloves with the skin removed, so it roasts quickly. It won’t get quite as roasted as when you do the whole heads, but it still adds great flavor
Nutrition Information:
Yield: 2 Serving Size: 2 peopleAmount Per Serving: Calories: 325Total Fat: 8gSaturated Fat: 2gTrans Fat: 0gUnsaturated Fat: 5gCholesterol: 103mgSodium: 2400mgCarbohydrates: 54gFiber: 4gSugar: 29gProtein: 11g
Nutrient values are estimates only. Variations may occur due to product availability and food preparation. Nutrition may vary based on methods of preparation, origin and freshness of ingredients, etc
Adapted from Rock Recipes
SS
Saturday 26th of October 2019
I just made this for dinner tonight and it went right into the "Keeper" folder to make again. I do want to point out a couple errors in the recipe, and what I did instead. I love the crispy texture of the chicken and I plan to use the technique to do other 'fried' nugget recipes since I don't make oil-fried foods at home.
1) The ingredients list never mentions olive oil, but the directions say to drizzle olive oil on the chicken when it goes into the oven. Fortunately, I had some olive oil available when I started cooking so I didn't have to substitute another oil. 2) In step 6 it says to combine the ingredients, including water. However there is no water listed for this portion of the recipe. Is there really supposed to be water here? If so, how much? I skipped putting in any water when I made this. 3) Also in step 6, it says to mix in salt, but again there is no salt listed in the ingredients in that section. I skipped putting in salt here as well because I was worried about making it too salty since I didn't know how much I was supposed to add. 4) Also in step 6, it says to add the minced garlic, but nowhere does it mention the clove of roasted garlic. I actually roasted a single clove of garlic as preparation for this recipe so I assumed I should add it at the same time as the minced garlic. 5) In step 7, it says to cook the sugar/water mixture. I was uncertain if we were supposed to stir or not. Some types of sugar caramelization need to sit untouched or else the sugar never gets hot enough to caramelize, and others need you to keep stirring to avoid the burning. I decided to stir until all the sugar was melted and then stopped stirring. I never got to any color change (after 15 minutes of cooking) but it had thickened to be more syrupy so I added my other ingredients at that point
One other note - my hubby and I LOVE spicy food. I am really glad I cut the chili paste down to 1 tbsp. It was right at the top end of our heat tolerance. :-)
Karyl
Friday 13th of December 2019
Thank you very much for your comments and input. I actually have this recipe on my list to update next month with some more images and instructions. And I will definitely be taking your notes into consideration as I do that. Thank you again!
SS
Saturday 26th of October 2019
Has anyone made this without roasting the garlic clove? Seems like a lot of wasted time for 1 clove, and I don't have an immediate use for an entire bulb. I won't be making any other recipes in the near future that need it, so please don't tell me to store the extra. Will the difference in roasted versus non-roasted really matter when combined with all the other strong flavors in this recipe.
Steve Fonnest
Tuesday 12th of December 2017
Hey Karyl,
My wife wants me to make General chicken for her. I was surprised that the normal recipes is actually fried! I am excited to try this version for a more healthy choice. Ignoring the sugar... 8)
How many oz. / pounds of chicken would you say the recipe uses? I am not a fan of thighs and would like to use breasts.
Karyl
Thursday 14th of December 2017
I use 4 ounces of chicken per person when I'm preparing it for myself...and that's when it is lunch. I'll go about 6 ounces per person for dinner.
Kimberly @ Berly's Kitchen
Monday 2nd of October 2017
Great job on the reshoot pictures! This looks really good. My husband is a big fan of General Tso's, but we've never tried making it at home. Maybe we should. Sounds pretty easy.
Karyl
Wednesday 4th of October 2017
Thank you so much Kimberly! I'm slowly going through my old posts and re-doing all the pictures. This is super easy to make at home.
Jessica Pinney
Sunday 1st of October 2017
I'm very partial to General Tso's chicken but have never thought to make it myself or bake it. You've inspired me! Thanks for that.